")


Pachete I2P pentru Debian
Debian sau Ubuntu, Toate versiunile
Pachetele Debian ar trebui să funcționeze pe majoritatea platformelor care rulează:- Ubuntu (Bionic 18.04 and newer)
- Mint(Tara19) or newer
- Debian Linux (Buster and newer)
- Knoppix
- Opțiune 1:Versiuni recente ale Ubuntu și derivațiile lui (Încercați acest pachet de instalare dacă nu utilizați Debian)
- Opțiune 2: Debian (inclusiv derivații-Debian)
Instrucțiuni pentru Ubuntu și distribuții derivate precum Linux Mint & amp; Trisquel
Adăugați PPA prin linia de comandă și instalați I2P
-
Deschideți un terminal și introduceți:
sudo apt-add-repository ppa:i2p-maintainers/i2p
This command will add the PPA to/etc/apt/sources.list.dand fetch the gpg key that the repository has been signed with. The GPG key ensures that the packages have not been tampered with since being built. -
Notifică managerul tău de pachete despre noul PPA prin introducerea:
sudo apt-get update
Această comandă va prelua cea mai recentă listă a software-ului de la fiecare depozit, care este activat pe sistemul dumneavoastră, inclusiv I2P PPA care a fost adăugat cu comanda anterioară. - Acum sunteți gata să instalați I2P!
sudo apt-get install i2p
Adding the PPA Using the Software Center
-
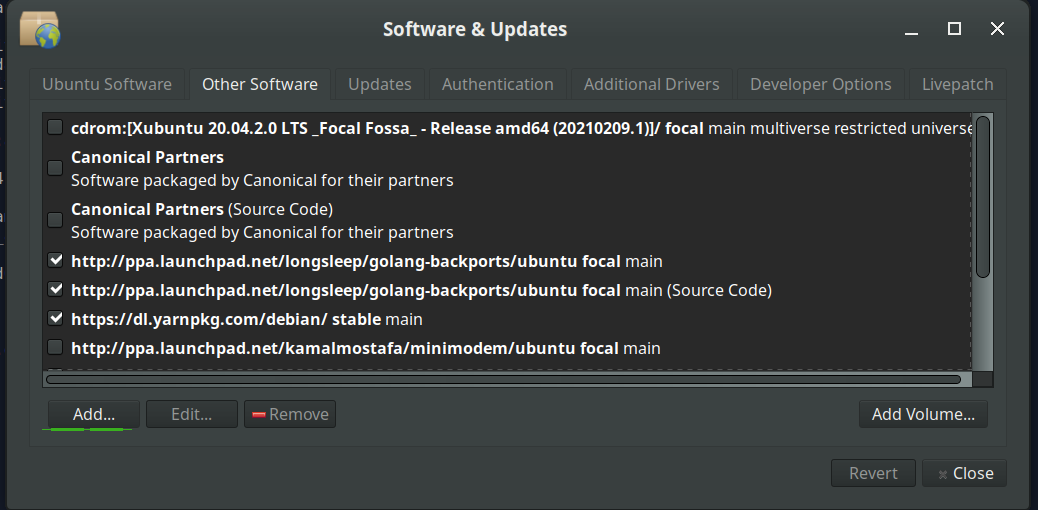
Open "Software and Updates" via the applications menu.

-
Select the "Other Software" tab and click the "Add" button at the
bottom to configure the PPA.
-
Add the PPA by pasting the URL:
ppa:i2p-maintainers/i2pinto the PPA dialog.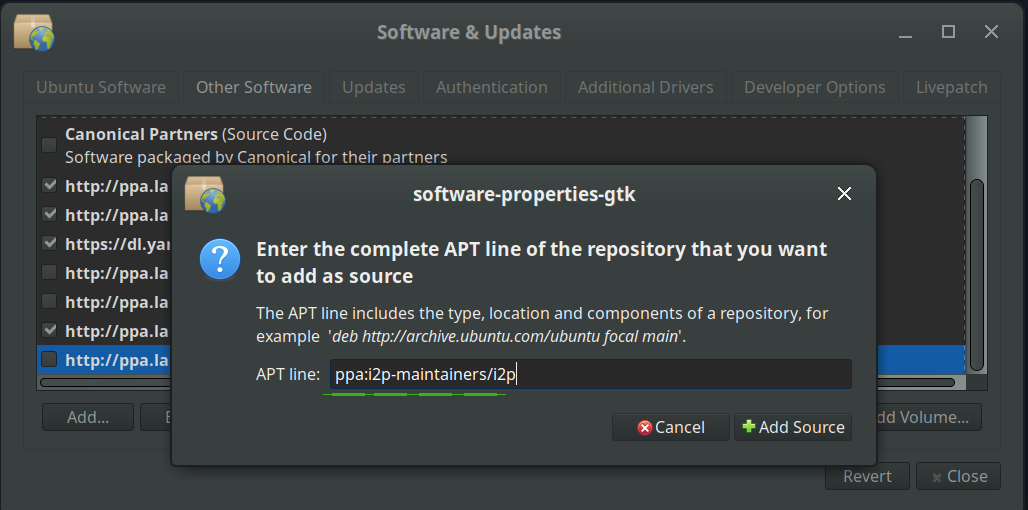
-
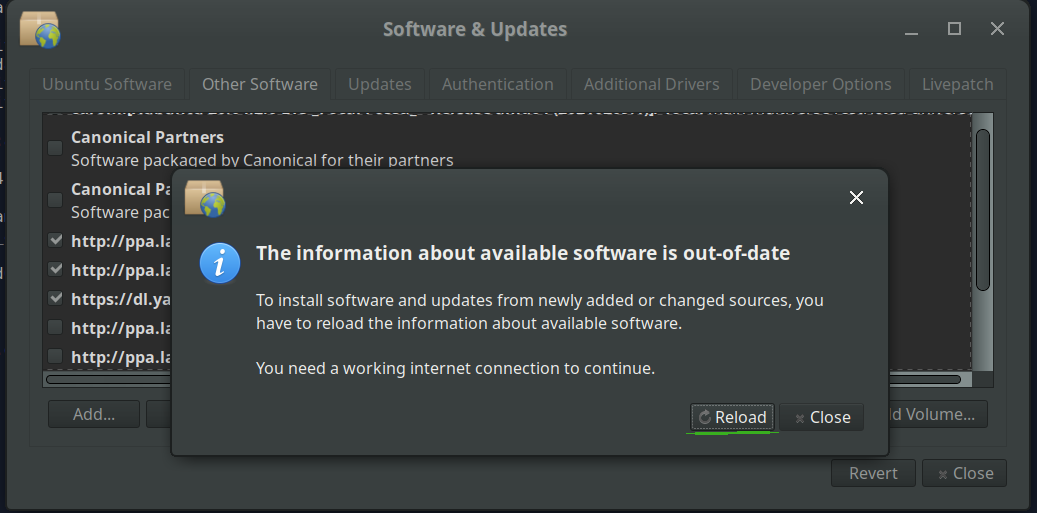
Download the repository information with the "Reload" button.
-
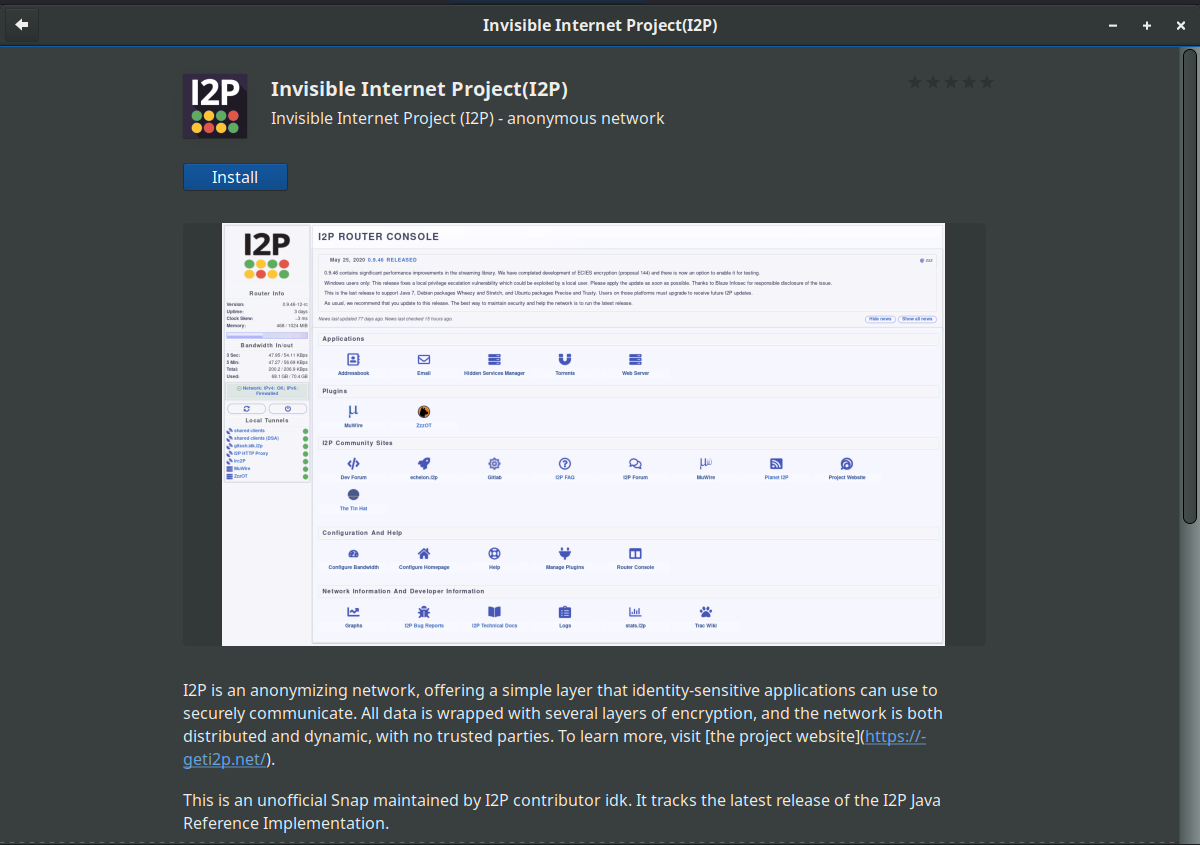
Install the I2P software using the "Software" tool from the
applications menu.
Instrucțiuni pentru Debian
NOTICE:
Our old Debian repos deb.i2p2.de and
deb.i2p2.no are EOL.
Please follow these instructions
to update to the new repository, deb.i2p.net.
Notă: Pașii de mai jos trebuie efectuați cu acces la root (exemplu: schimbând
din utilizator normal în utilizator root folosind comanda su sau prin folosirea comenzii su după utilizarea fiecarei comenzi sudo), exemplu: sudo su .
- ,
- Ensure that
apt-transport-https,curl,lsb-releaseare installed.sudo apt-get update sudo apt-get install apt-transport-https lsb-release curl -
Check which version of Debian you are using on this page at the Debian wiki
and verify with
/etc/debian_versionon your system. Then, for Debian Bullseye or newer distributions run the following command to create/etc/apt/sources.list.d/i2p.list.
# Use this command on Debian Bullseye or newer only. echo "deb [signed-by=/usr/share/keyrings/i2p-archive-keyring.gpg] https://deb.i2p.net/ $(lsb_release -sc) main" \ | sudo tee /etc/apt/sources.list.d/i2p.list# Use this command on Debian Downstreams like LMDE or ParrotOS only. echo "deb [signed-by=/usr/share/keyrings/i2p-archive-keyring.gpg] https://deb.i2p.net/ $(dpkg --status tzdata | grep Provides | cut -f2 -d'-') main" \ | sudo tee /etc/apt/sources.list.d/i2p.list# Use this command on Debian Buster or older only. echo "deb https://deb.i2p.net/ $(lsb_release -sc) main" \ | sudo tee /etc/apt/sources.list.d/i2p.list# Use this command on Debian Buster or older only. echo "deb https://deb.i2p.net/ $(dpkg --status tzdata | grep Provides | cut -f2 -d'-') main" \ | sudo tee /etc/apt/sources.list.d/i2p.list - Descărcați cheia folosită pentru semnarea depozitului de pachete la::
curl -o i2p-archive-keyring.gpg https://geti2p.net/_static/i2p-archive-keyring.gpg - Display the key fingerprint.
gpg --keyid-format long --import --import-options show-only --with-fingerprint i2p-archive-keyring.gpg7840 E761 0F28 B904 7535 49D7 67EC E560 5BCF 1346 - Copy the keyring to the keyrings directory:
sudo cp i2p-archive-keyring.gpg /usr/share/keyrings/etc/apt/trusted.gpg.d.sudo ln -sf /usr/share/keyrings/i2p-archive-keyring.gpg /etc/apt/trusted.gpg.d/i2p-archive-keyring.gpg -
Notify your package manager of the new repository by entering:
sudo apt-get update - You are now ready to install I2P! Installing the
i2p-keyringpackage will ensure that you receive updates to the repository's GPG key.
sudo apt-get install i2p i2p-keyring
După ce procesul de instalare se încheie puteți trece la următoarea parte de a porni I2P și de a configura I2P pentru sistemul dvs.
Muncă post-instalare
Folosind aceste pachete I2P router-ul I2P poate fi pornit în următoarele trei moduri:-
"la cerere" folosiți scriptul i2prouter. Porniți simplu "
start i2prouter" din promptul de comandă. (Notă: nu folosiți sudo și nu îl rulați ca și utilizator root!) -
"la cerere" fără java service wrapper
(necesar pe sisteme non-Linux/non-x86 ) prin rularea "
i2prouter-nowrapper". (Notă: Nu folositi sudo și nu îl rulați ca și utilizator root!) -
ca un serviciu care rulează automat la incărcarea sistemului, chiar
înainte de a vă autentifica. Serviciul poate fi activat cu "
dpkg-reconfigure
I2P
"ca root sau utilizînd comanda sudo. Acesta este mijlocul recomandat de funcționare.
Când instalați pentru prima dată, vă rugăm să nu uitați să vă setați NAT-ul/firewall-ul dacă puteți. Porturile pentru inaintare pot fi găsite în pagina de configurare a rețeleidin consola router-ului. Dacă este nevoie de îndrumare în ceea ce privește porturile de forwarding, poate găsiți portforward.com ca fiind folositor.
Vă rugăm să examinați și să adaptați setările de lățime de bandăla pagina de configurare deoarece setările implicite de descărcare de / 96 KB/s descărcare și 40 KB/s de încărcare sunt destul de conservatoare.
If you want to reach I2P Sites via your browser, have a look on the browser proxy setup page for an easy howto.